
Amdox Tail is a wireless screen tap that serves as a seamless alternative to conventional HDMI cables. It revolutionizes traditional meeting rooms by facilitating swift screen projection in conference rooms, thereby enhancing their functionality.
The key highlight of Amdox Tail lies in its ability to effortlessly achieve wireless screen projection. This feature, when compared to wired projection, streamlines the initiation of conference room meetings, doing away with the necessity for attendees to pre-prepare by arriving at the conference room in advance.

In the subsequent sections, we will provide a brief introduction to Amdox Tail and a step-by-step guide on how to effectively utilize the Tail.
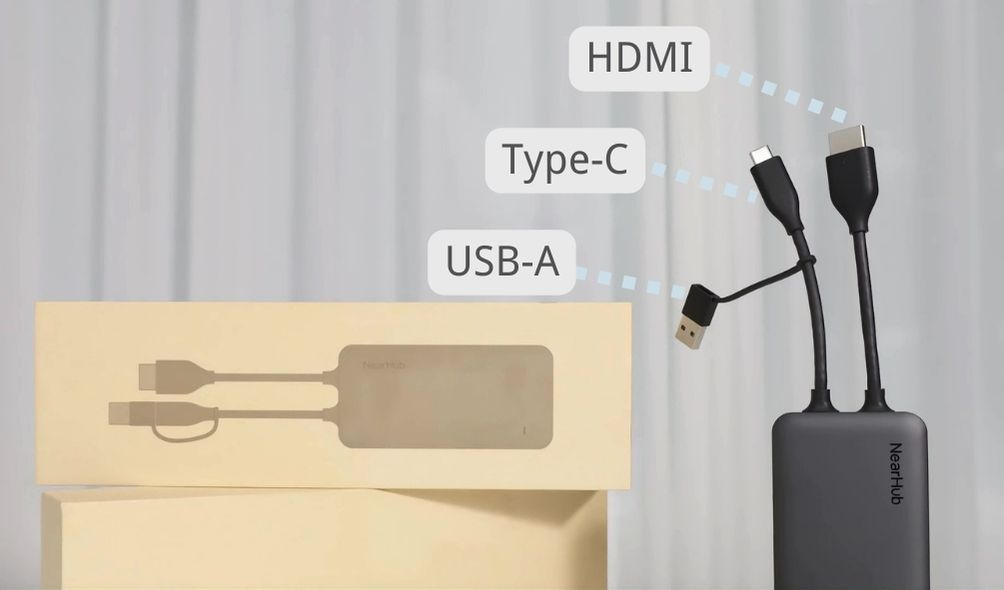
As you can see in the picture, the Tail has two cables with three types of connectors. The three connectors are USB-A, Type-C and HDMI from left to right. They are necessary during the pairing and connection procedures, adapting to specific requirements as needed.
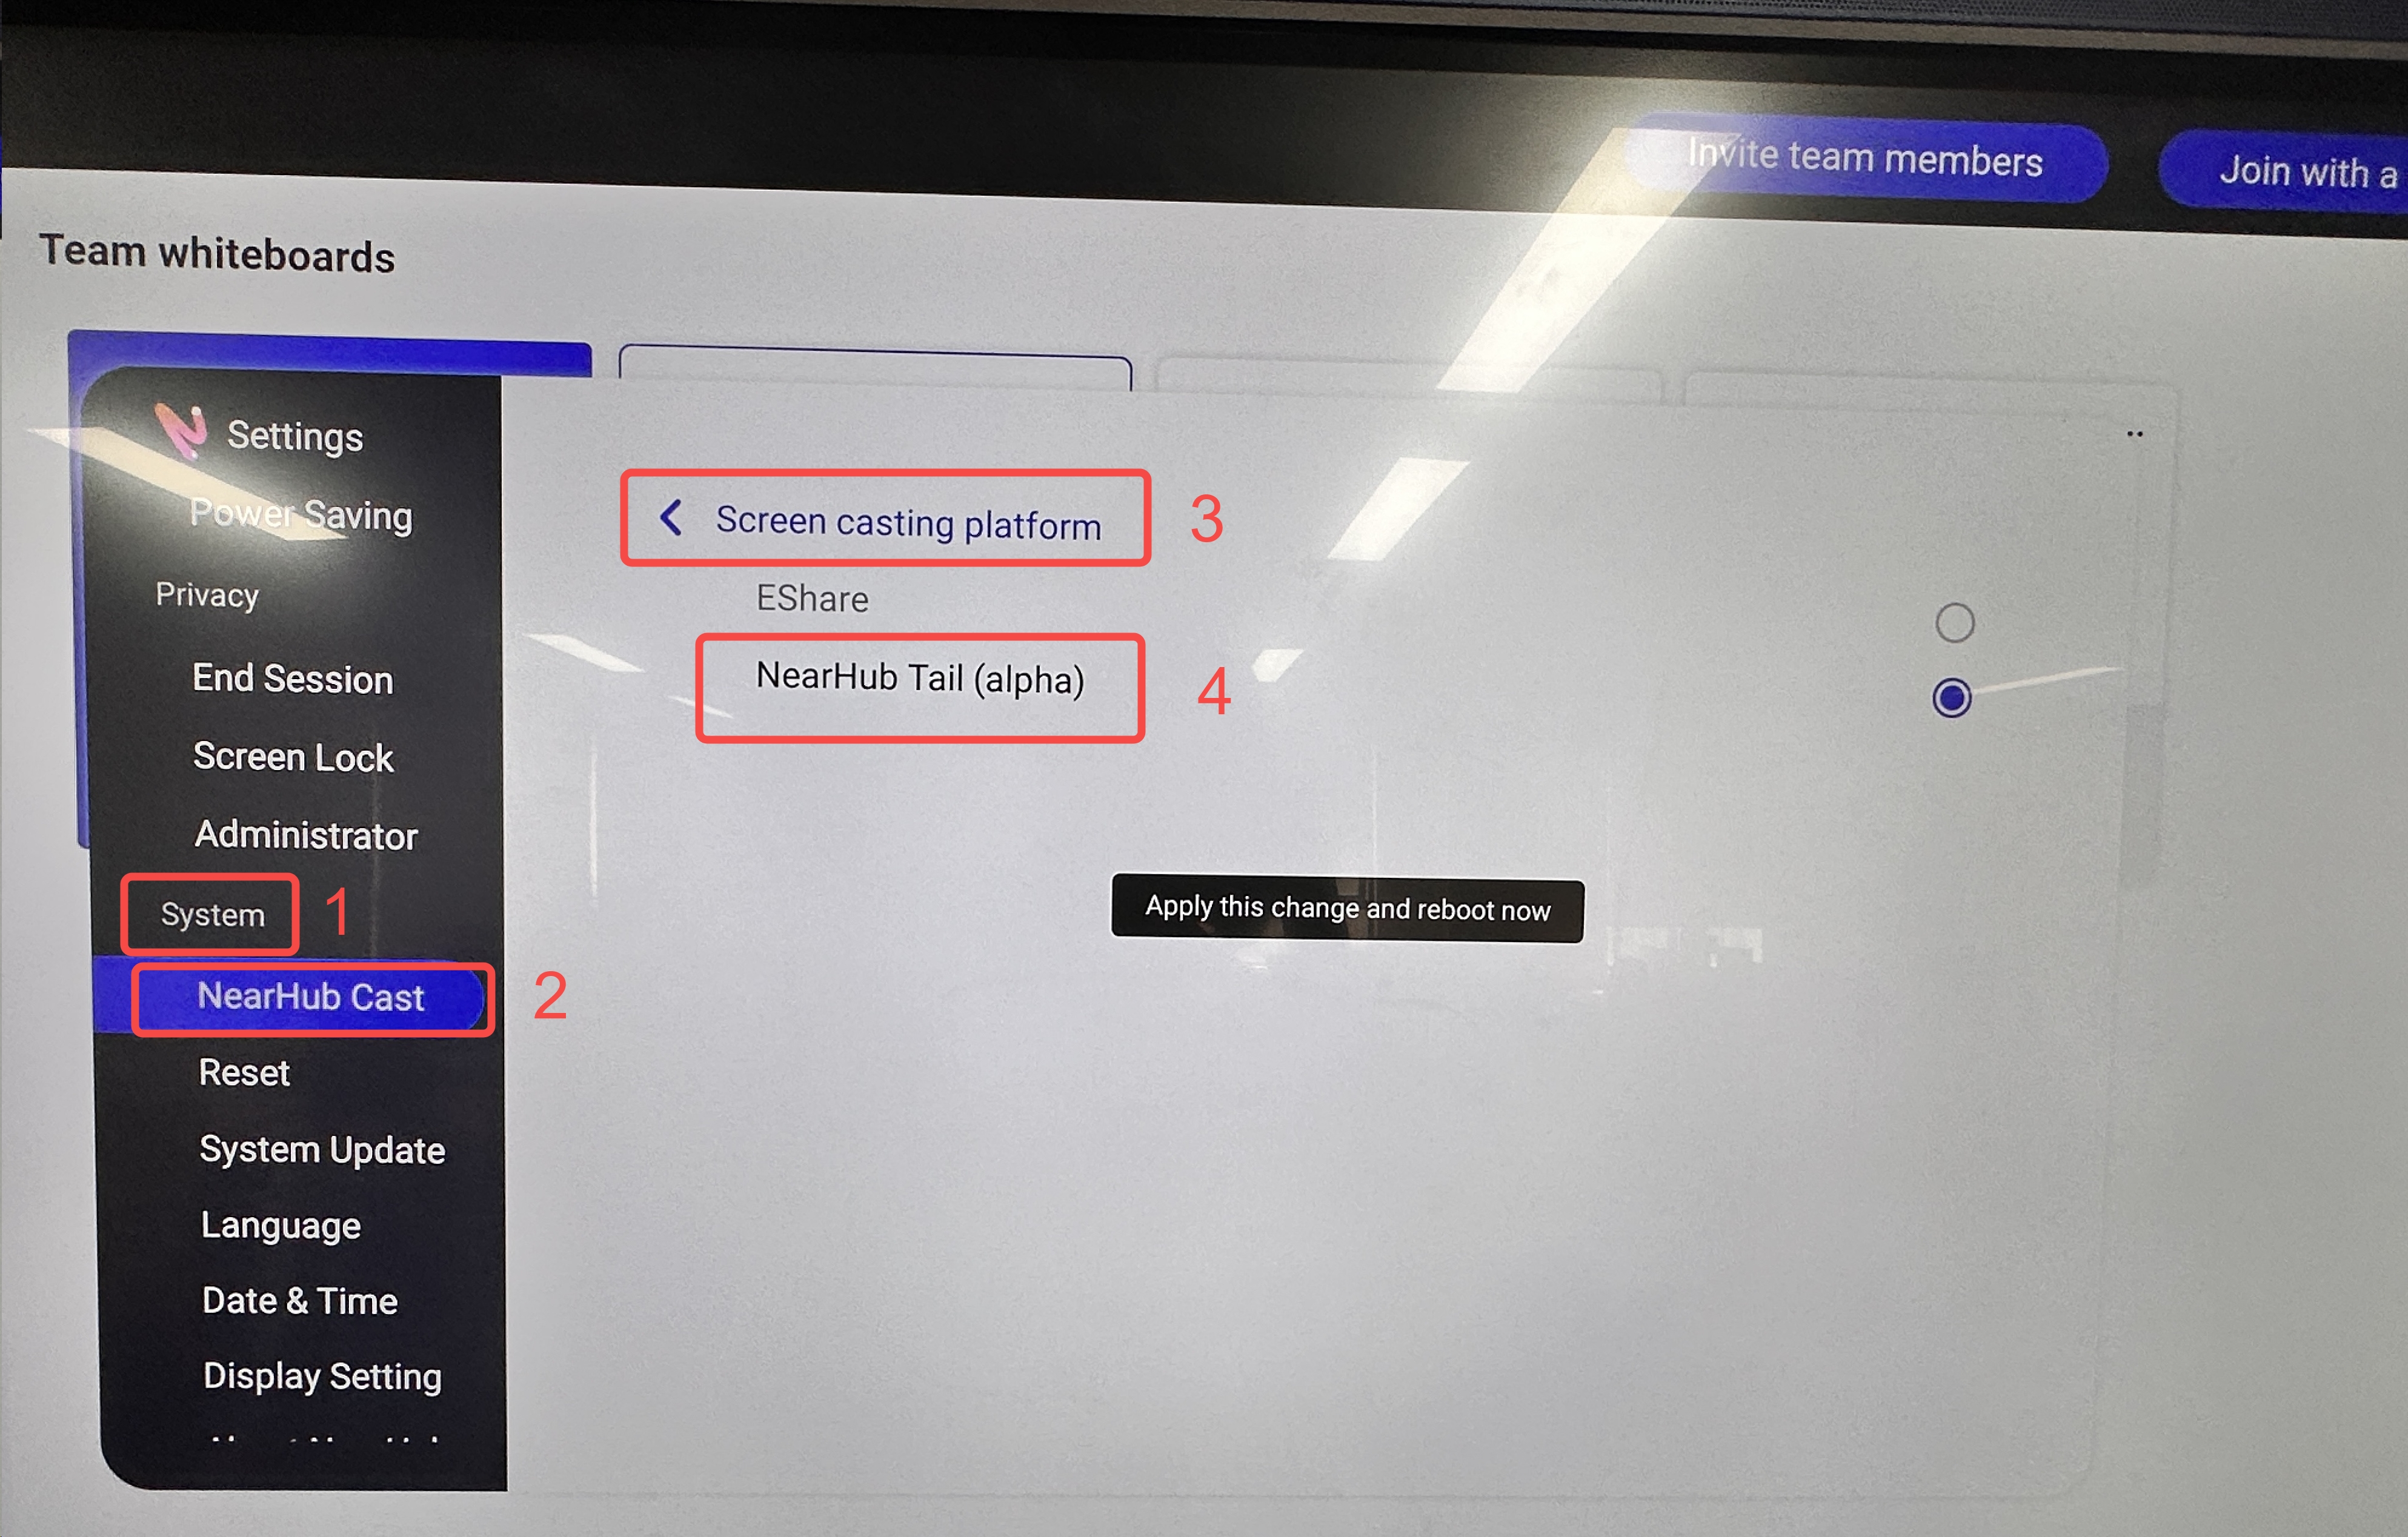
To ensure that Amdox Tail can be used smoothly and successfully, you need to make sure that the casting platform on your Amdox Board has been switched to Tail mode before using the Tail. Follow these steps:
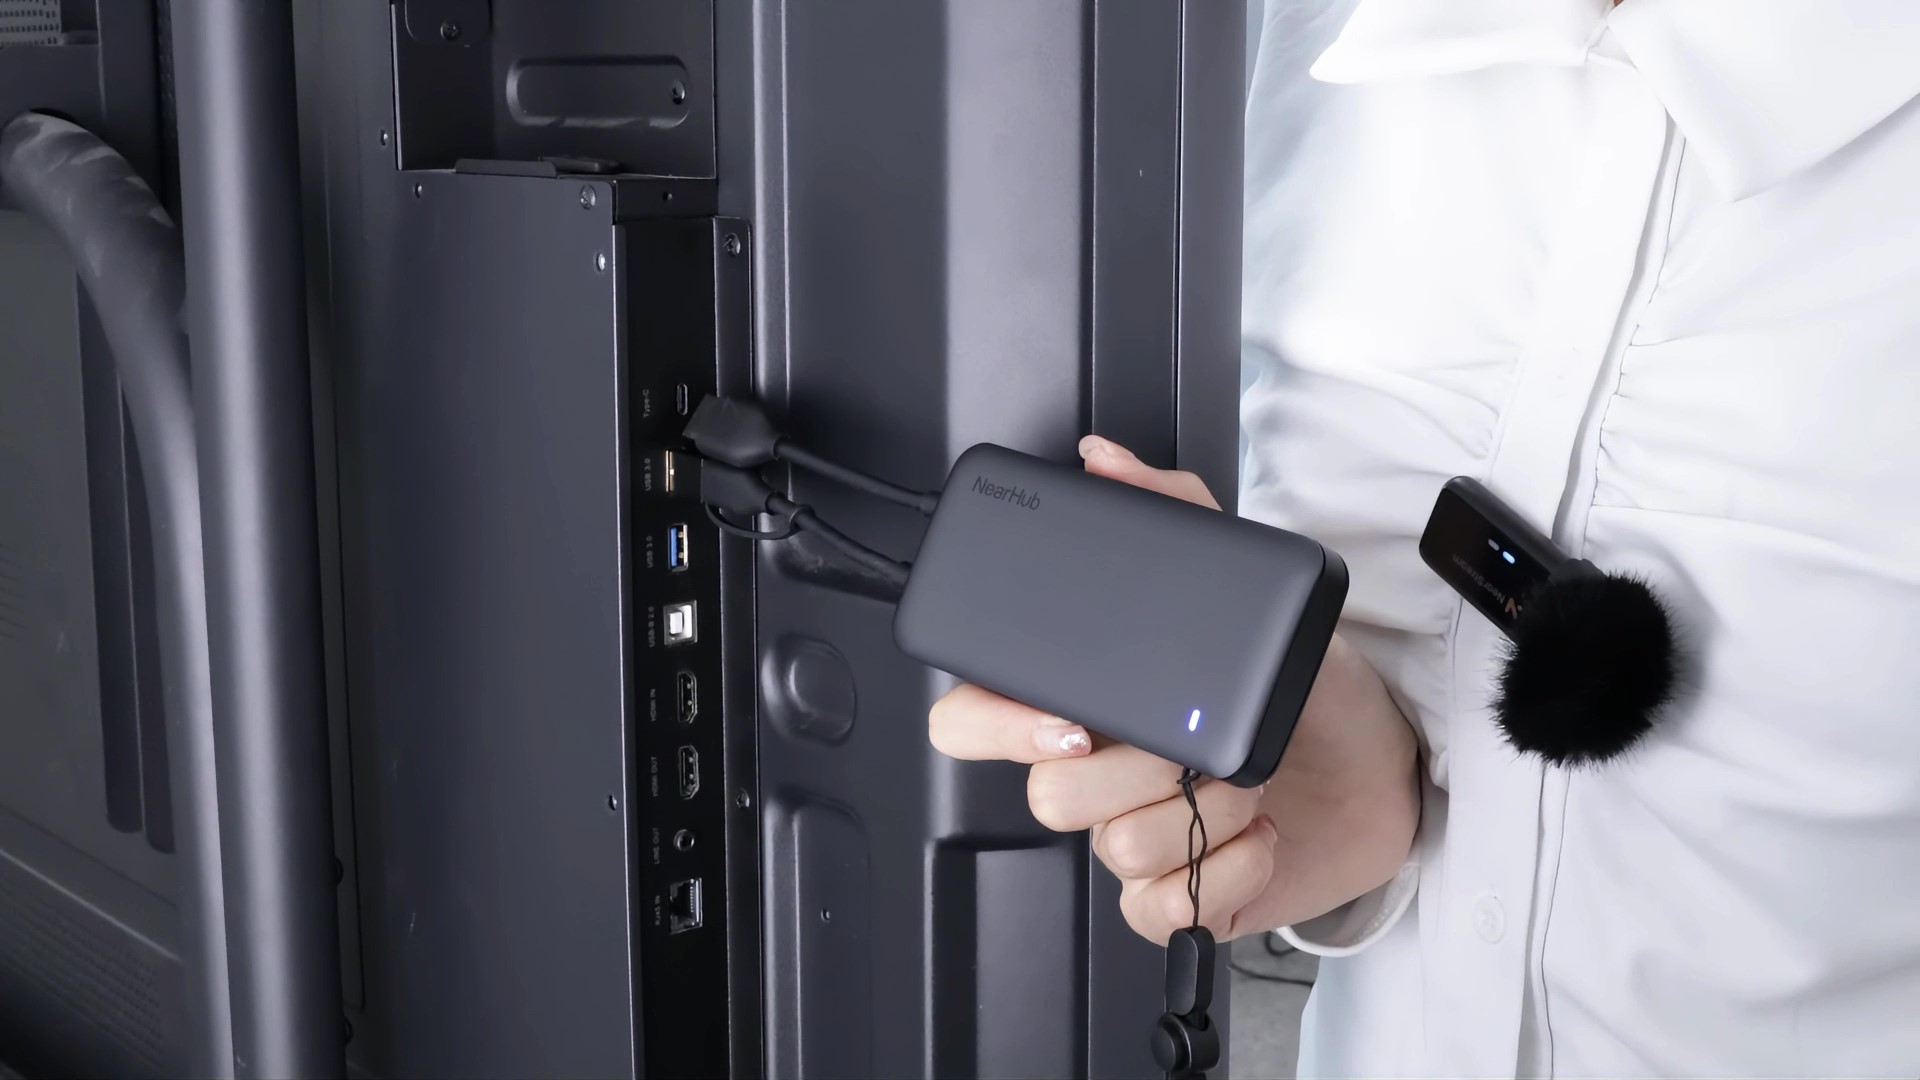
For fast screen projection, the Tail must first be paired with your Amdox Board.
✅ Pairing only needs to be done once. You don’t need to repeat this in future uses.
Once paired, unplug the Tail from the board and connect it to your computer using the appropriate interface.
Some Windows devices may support direct USB-C connection.
If casting fails, repeat the steps starting from pairing.
These connector options comprehensively address the diverse needs of modern screen projection. Based on your computer’s configuration, choose the method that suits you best.
Once Amdox Tail is paired successfully, you can simply plug it into your device for instant wireless screen sharing. This dramatically simplifies meeting prep and elevates presentation efficiency.
